It’s crazy, there is a ton of old weird film out there: recans, expired, and just plain ancient film for sale on ebay. You just never know what is going to show up. In this video I explore the idea a little bit. What’s the oldest film you have tried out, and what was the result?
I rarely go out shooting with a light meter, I usually just use the sunny 16 rule and “go with it”. I had an earlier question about using the Sunny 16 rule, so I did a quick video that give you a run down.
Sometimes you have the tool but you don’t know what job it’s for. In this video I come up with 7 ways you could use 16mm. Do you have any other ideas? I would love to hear them.
I had a great question on the Youtube channel, “Why would you ever want to hand develop your 16mm film instead of just sending it out to be professionally processed?”. For me it comes down to a few very basic ideas.
I like doing stuff my self even if the product is not as good.
I am a cheap skate.
I don’t want to waste money on old outdated film.
I like the results which would be difficult to get with a professional lab.
There are probably more that I just can’t come up with right now. I explain it more in depth in the short video below.
Someone interested in purchasing film asked if I could help find a Bolex H16 manual. I did some digging and found this in my files. Bolex H16 User Manual
I have been asked to further expand on my telecine setup, but I have put it off until now because it’s a bit messy. Again I will confess, I am a cheapskate and I wanted to edit my 16mm in my computer without spending $.15 a foot or more. My little 3 minute Child’s Summer short used about 20 100′ rolls so just that project would total $300 for commercial telecine services. I toyed with the idea of creating my own rig to hold the film and move it one frames at a time, but after one test rig I gave up and decided to retrofit an existing projector. A friend had lent me an old Eiki ST/M and that seemed the best candidate.
Projector Alterations:
Advance film one frame at a time.
Sense the proper time to trigger capture.
New light source that won’t burn the film.
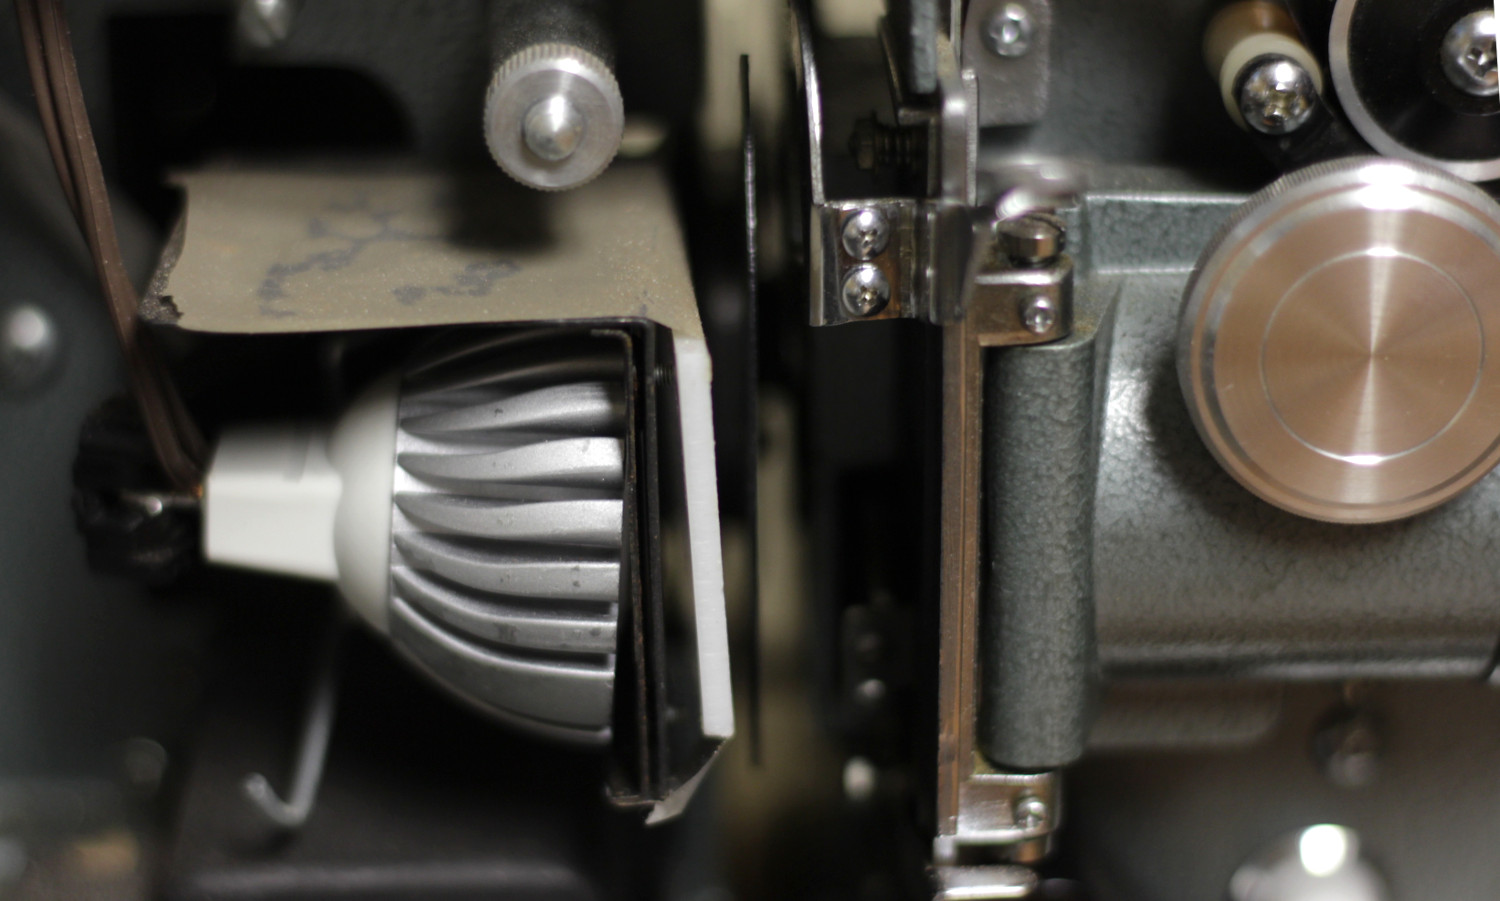
I bolted a heavy stepper motor on the projector where it would align with the pulley on the shutter and found a belt that would stretch tight. I also bolted on a micro switch that would interact with the outer edge of the shutter, this senses the proper time to capture the frame.
I also remove the bulb and place an LED light into the spot along with an opaque plexiglass panel to create a flat white light source.
Capture device critera:
Cheap
Able to take 100,000 images or more without dying
Ability to capture at least 1280×720 raw images after cropping
Manual exposure
Remote Shutter release
I would have like to use a DSLR camera for the capture but they fail the first two critera on the list. The problem of shutter life was really the clincher, any used DSLR cheap enough for this project would already be too close to shutter death.
I am currently using a used Canon G5 camera and it has worked well for over 120,000 frames so far. The G5 has one major flaw for this project and that was no remote shutter release. Aaarrrrg. It would have made it so easy. Anyway I had to create a simple jig to hold the camera and a stepper motor with padded lever to depress the button. I guess when the button wears out I will either find a new camera or dig into this one and try to wire around it.
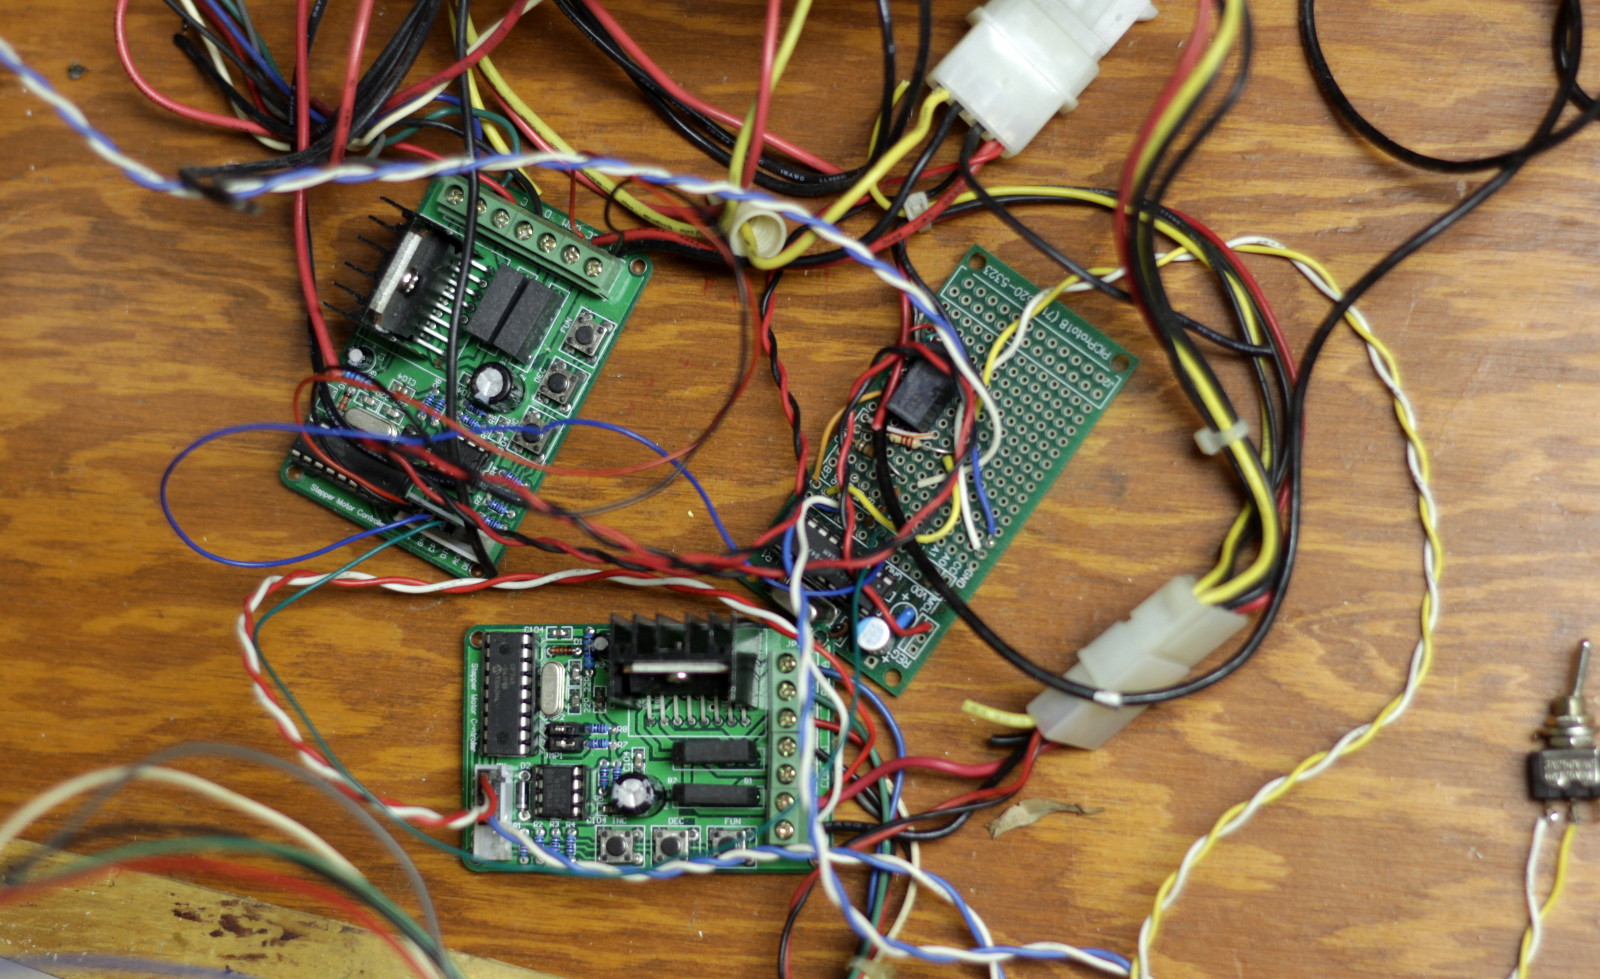
To run the various steppers I have a couple of inexpensive stepper motor controllers and I programmed a simple microcontroller to sense the switch and tell the stepper motor controllers when to run. I also added a simple switch to tell the brain when to stop loading the film and to start capturing images. After the controller captures 4000 images or about 100′ of film it shuts down. The whole thing is powered by an ancient recycled computer power supply.
I have some ideas for future additions, but I really don’t know if I will ever get around to it. How about a puff of air to clear the dust just before capture. I could enclose the whole thing and make it look professional. I could enhance the interface to capture an adjustable number of frames. A newer camera would probably give me more pixels and recover faster when taking a picture. This could not go too much faster before outrunning the camera.
When it comes to cheaply using 16mm film I think the two hard parts are developing and telecine. Hand processing is difficult without a decent daylight tank. Here are some of the tanks that I have used in the past and what I currently use.
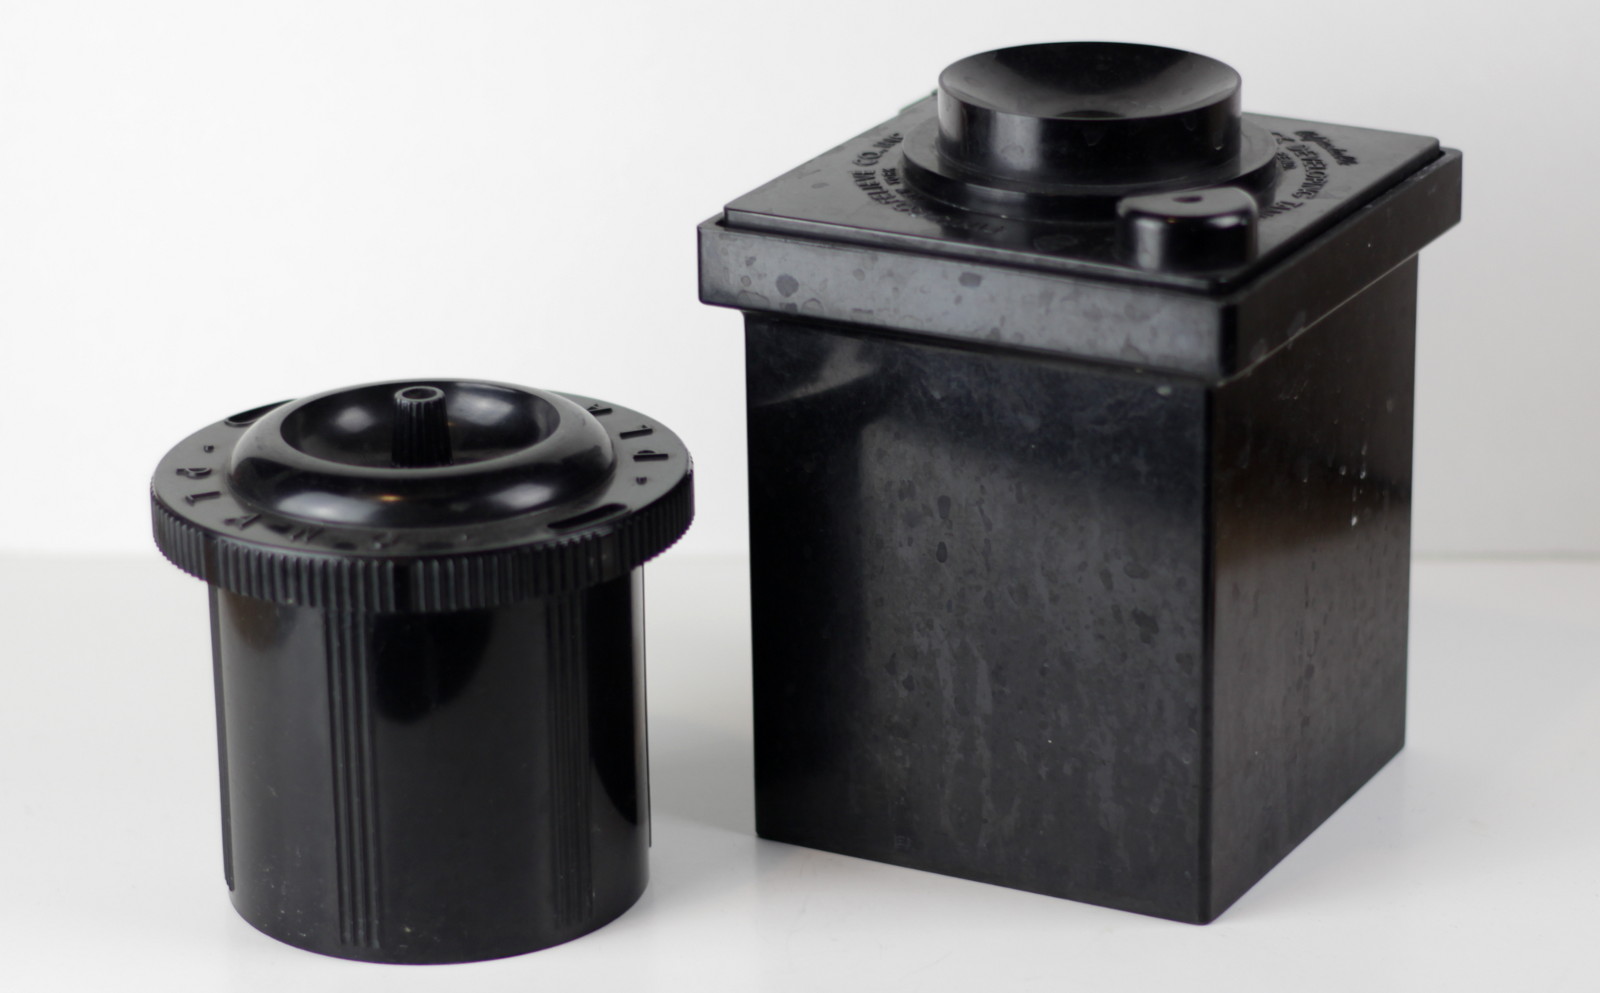
I am lucky to have inherited a good bit of old photography stuff. Both of these tanks were used by my grandfather many years ago. The square tank is a 4×5 cut film tank that will work for processing super 8 or you can stuff maybe 1/3rd of a roll of 16mm in there, but it won’t turn out very well.
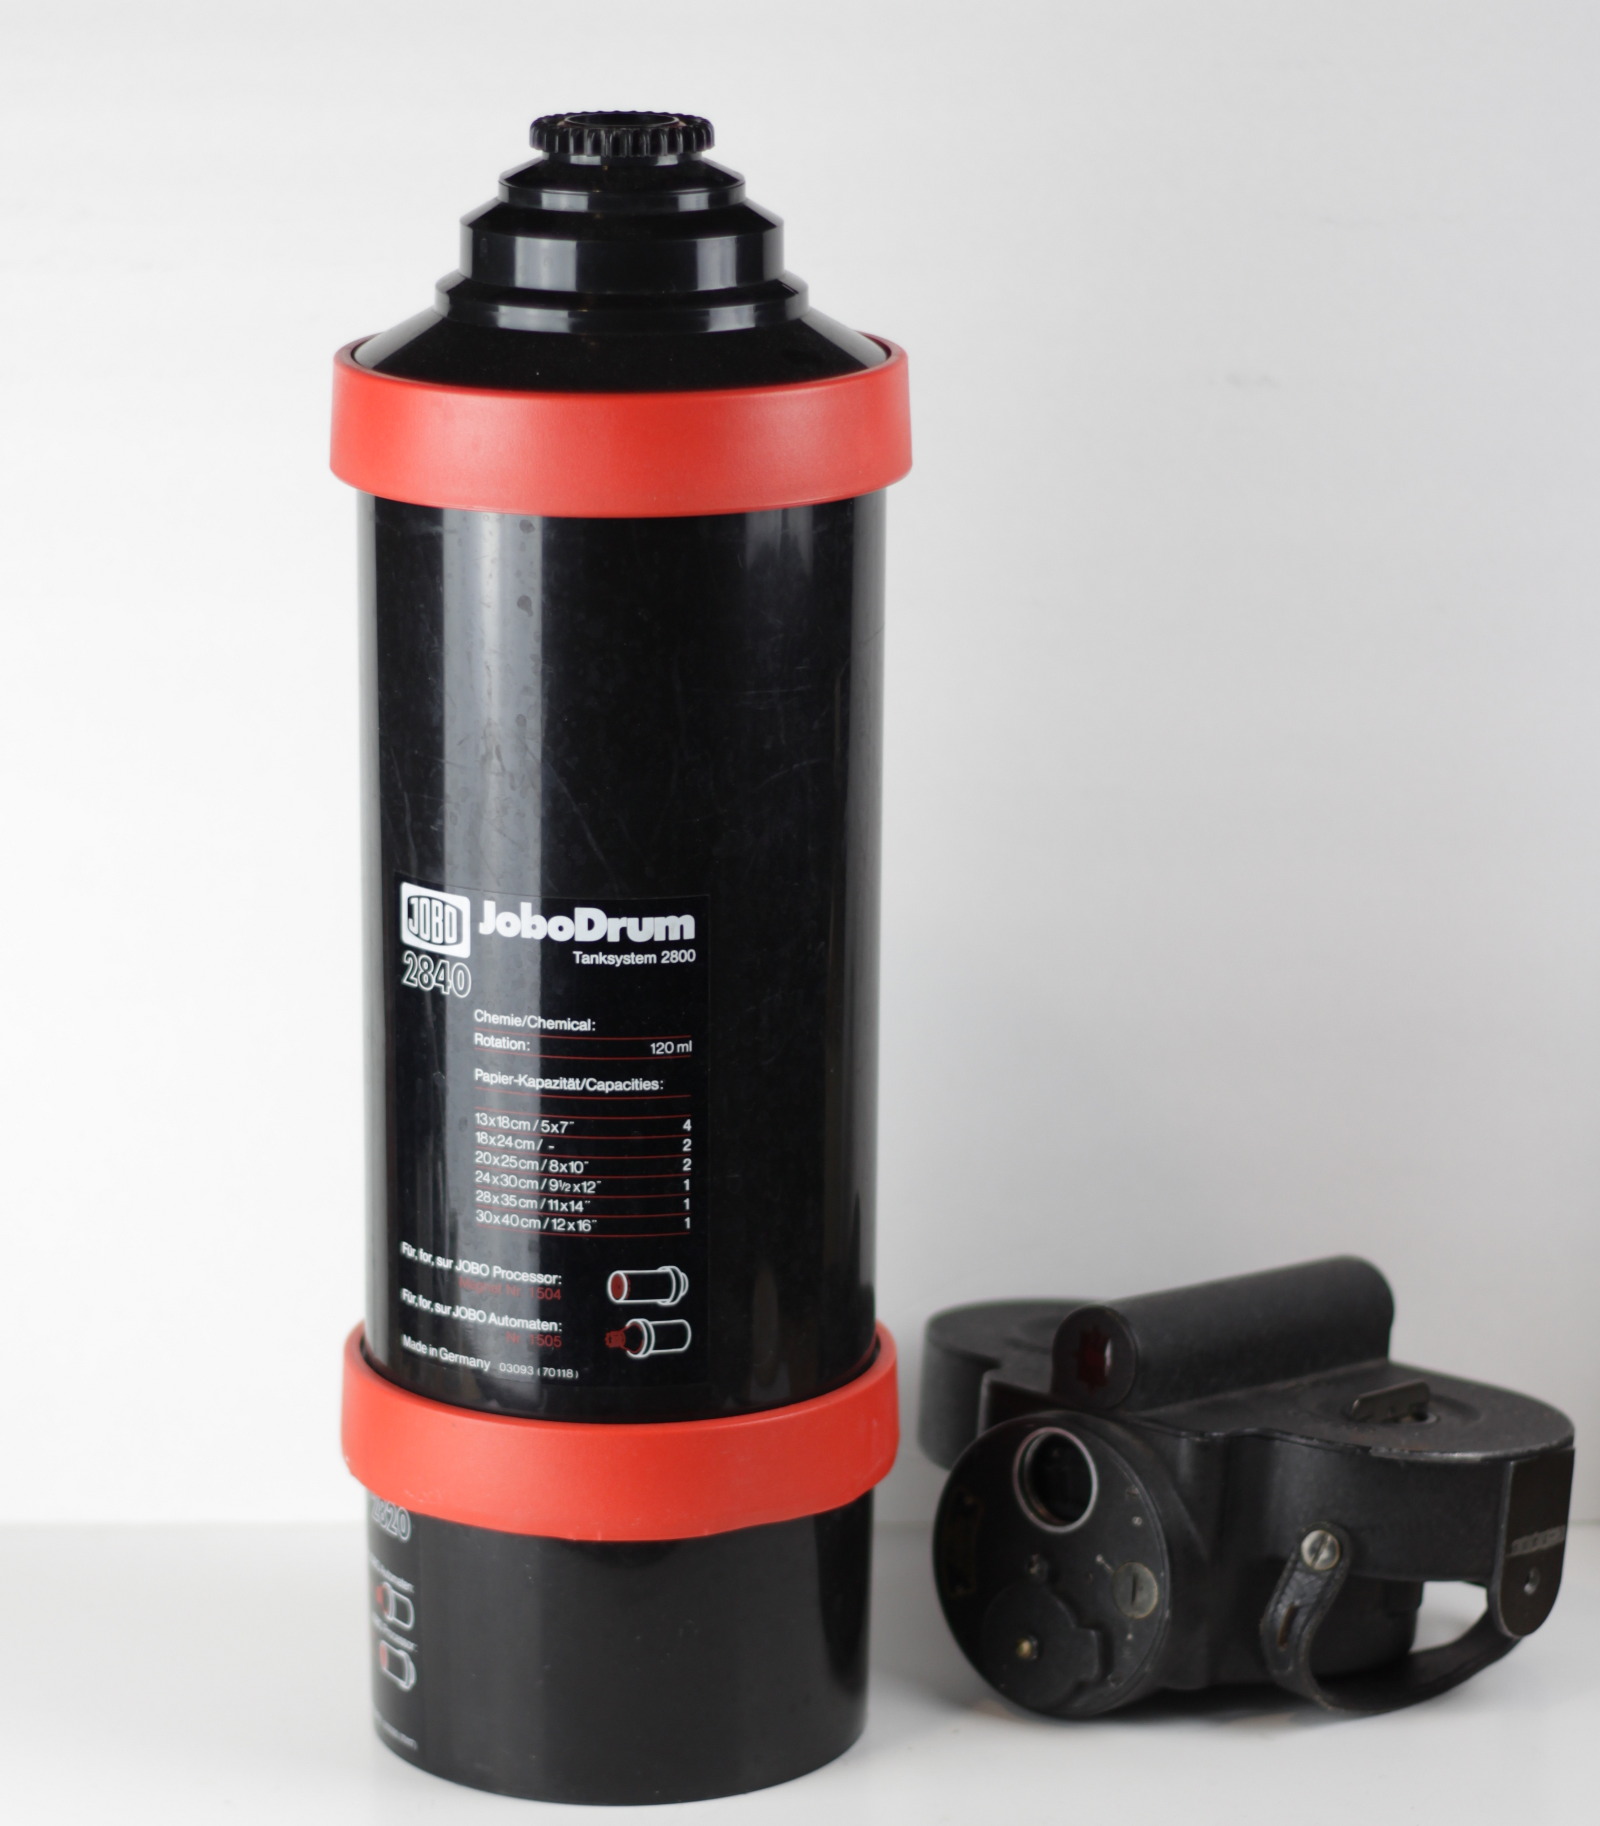
Once I really started working with 16mm I really needed a bigger tank and I pick up one of these on ebay. It’s a Jobo 2800 system tank that is made for paper developing. It worked alright until the top lip on the tank started to deform. I replace the drum, but I still don’t like how delicate the tank is, so I started to think about making my own.
So I headed off to the lumber yard and started to stalk the plumbing section. I bought a piece of 6″ pvc pipe and various fittings.
The tank turns out to be light tight and pours just about as fast as the Jobo tank. The top seemed just a little too complicated. So I kept going.
This is where I would recommend people start if they want to make an easy and inexpensive tank. The top is much easier than my previous version and work almost as well. The only issue I have had is that sometimes an end of the film wants to pour out with the liquids. A quick inversion while pouring will remedy the situation. It is made from 1 foot of 6″ pvc with two caps and 4 – 1″ schedule 40 street elbows. I drilled a single hole in the top cap to fit the outer diameter of the elbow and glued it all together.
The 6″pvc tank body does need to be sanded down a bit so the lid does not stick on too tight. Also you might noticed that I didn’t bother to paint the body, I found the plastic thick enough to block light (ymmv). The 6″ pipe sections are about 10″ to a 12″ long making the tank just the right size for a 100′ roll of film with a little wiggle room. I have used the tanks many times and they have proven quite easy to use, cheap and durable.
Recently Jason in South Wales was asking for advice about developing KODAK WL Surveillance Film 2210.
Here is what he has tried:
I have made a few tests with Ilfosol3 I have attached a small screen shot of a scan. I loaded 6ft into a small spiral inversion tank, 2.5ml of Ilfosol3 and 160mm of water, 20 degrees, pre soak around 2minutes, 6mins developing, fix 5 minutes or so, wash 30 mins. but the problem was that only 1ft out of the 6ft developed the rest of the negative was very faint and couldn’t be scanned.
Well, it looks like he is off to a good start at least with the one foot that came out. I am guessing the stuff that came out too faint was just not fully submerged in developer. I am waiting to hear how it turns out.
Color Intermediate film like 7243 and 7244 — If you are interested in buying some of this film you can find it on my ebay page.
Regular color films like ektachrome and fuji color films
Black and white films like tri – x and plus x
Film this will not work with: Kodachrome
What kind of dark room will you need:
Just someplace truly dark, a photo darkroom or even a dark closet – room at night.
You will need a laundry or kitchen sink
You will need 2 or 3 one gallon plastic pitchers for mixing your chemicals.
You will need a Dark tank or you will have to do the whole process in the dark.
You will need some place to hand the film to dry.
You will need a simple timer, 5 minutes will work well.
You will need 2 or 3 chemicals for this:
Prewash Borax – 50g of 20 mule Team Borax from Walmart will work fine. This is optional if you are not processing a film with a remjet coating.
Dektol Developer – you will need 25g per 100’ of film.
Simple fixer – you will need 70g of sodium thiosulfate penta.
Water
Now we have everything we need – lets get started.
Step 1. Mix your chemicals
In each one of your pitchers put about 1 gallon of approximately 100 degree water.
and pour in each of your chemicals into a separate pitcher – it is best to have your
pitchers marked, so you don’t mix them up. Give them a stir or two. We will let this
dissolve while we work on the next step.
Step 2. Loading the film in your dark tank.
We need to load the film into our dark tank in a darkroom or dark closet.
The film needs to be spooled off of the reel and gathered into 3 or 4 foot loops and then
stuffed into the tank so as little of the film touches itself as possible. When it is all stuffed
into the tank close it up.
Step 3. Let’s get developing.
If you are developing a remjet coated film, we are going to start with a borax prewash.
Pour your borax prewash into your tank and agitate for about one minute. You can let
the tank rest for one minute then give it a shake and pour out the prewash. This step
is not time critical, if you have a stubborn remjet coating then you can agitate it more
or let is soak a little longer. As you pour out the prewash, it should have a lot of remjet
in suspension so the water should look dark purple or black.
Step 4. Rinse (optional)
Fill up the tank with room temperature water and pour out.
Step 5. Developing bath
Pour your developing solution into the tank and agitate for the first minute.
Agitation helps eliminate adhesions in the film that will cause the film to not get
developed in certain areas. After the first minute then you can just give it a shake for 10
seconds every minute or so. Develop for 5 or 6 minutes. This is a good starting point
for development, you may need to go longer for some films or for underexposure.
Pour out developer.
Step 6. Rinse
For a stop bath we are just going to fill the tank with room temperature water again,
give it a shake and pour it back out.
Step 7. Fix
Pour the fixer solution into your tank, and give a shake or two every minute.
After 4 minutes you can take the lid off the tank and see what you have.
If parts of you film have a milky look to them then pull the film a little out of the
tank and rotate and stuff it back into the fixer. Check for adhesions and pull them apart
before putting the film back in. Then wait until it is uncloudy.
Now you can pour the fixer out.
Step 8. Final Rinse
Put the tank under the faucet and run water over the film for 5 minutes or so.
If you want to be very sure you get all the fixer out then you will need to use a
hypo clearing bath (very optional). As the water is running over the film you can
check for any remaining remjet and gently rub it off with your fingers.
Step 9. Photoflo (optional)
If you want to avoid water spots then this would be the time to put a little photoflo
or similar into your rinse tank.
Step 10. Untangle the Film
Now you can pull the film out of the tank and untangle the ball. After untangling
the film you can run it through your fingers and squeegee most of the water off.
You can even you a cloth to help dry it a bit.
Step 11. Hang the film to dry
Notes: This develops the film as a negative, so if you are developing reversal films like tri-x or plus-x they will be negative not positive. Colors films will be black and white negative with an orange mask. If you use this method on fast films they will be extremely contrasty and grainy.