I have been asked to further expand on my telecine setup, but I have put it off until now because it’s a bit messy. Again I will confess, I am a cheapskate and I wanted to edit my 16mm in my computer without spending $.15 a foot or more. My little 3 minute Child’s Summer short used about 20 100′ rolls so just that project would total $300 for commercial telecine services. I toyed with the idea of creating my own rig to hold the film and move it one frames at a time, but after one test rig I gave up and decided to retrofit an existing projector. A friend had lent me an old Eiki ST/M and that seemed the best candidate.
Projector Alterations:
Advance film one frame at a time.
Sense the proper time to trigger capture.
New light source that won’t burn the film.
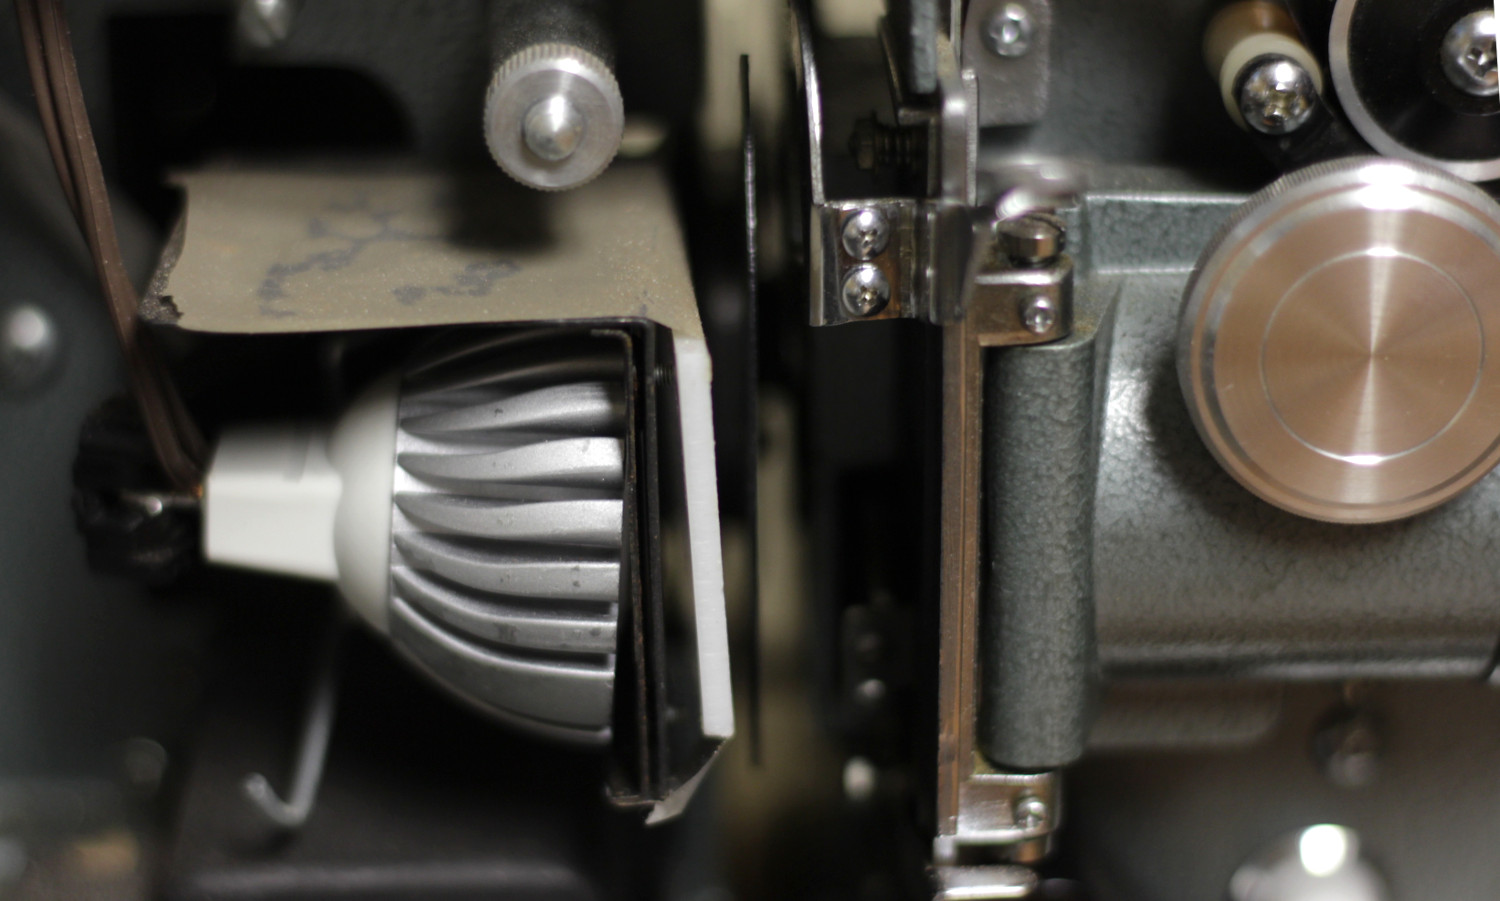
I bolted a heavy stepper motor on the projector where it would align with the pulley on the shutter and found a belt that would stretch tight. I also bolted on a micro switch that would interact with the outer edge of the shutter, this senses the proper time to capture the frame.
I also remove the bulb and place an LED light into the spot along with an opaque plexiglass panel to create a flat white light source.
Capture device critera:
Cheap
Able to take 100,000 images or more without dying
Ability to capture at least 1280×720 raw images after cropping
Manual exposure
Remote Shutter release
I would have like to use a DSLR camera for the capture but they fail the first two critera on the list. The problem of shutter life was really the clincher, any used DSLR cheap enough for this project would already be too close to shutter death.
I am currently using a used Canon G5 camera and it has worked well for over 120,000 frames so far. The G5 has one major flaw for this project and that was no remote shutter release. Aaarrrrg. It would have made it so easy. Anyway I had to create a simple jig to hold the camera and a stepper motor with padded lever to depress the button. I guess when the button wears out I will either find a new camera or dig into this one and try to wire around it.
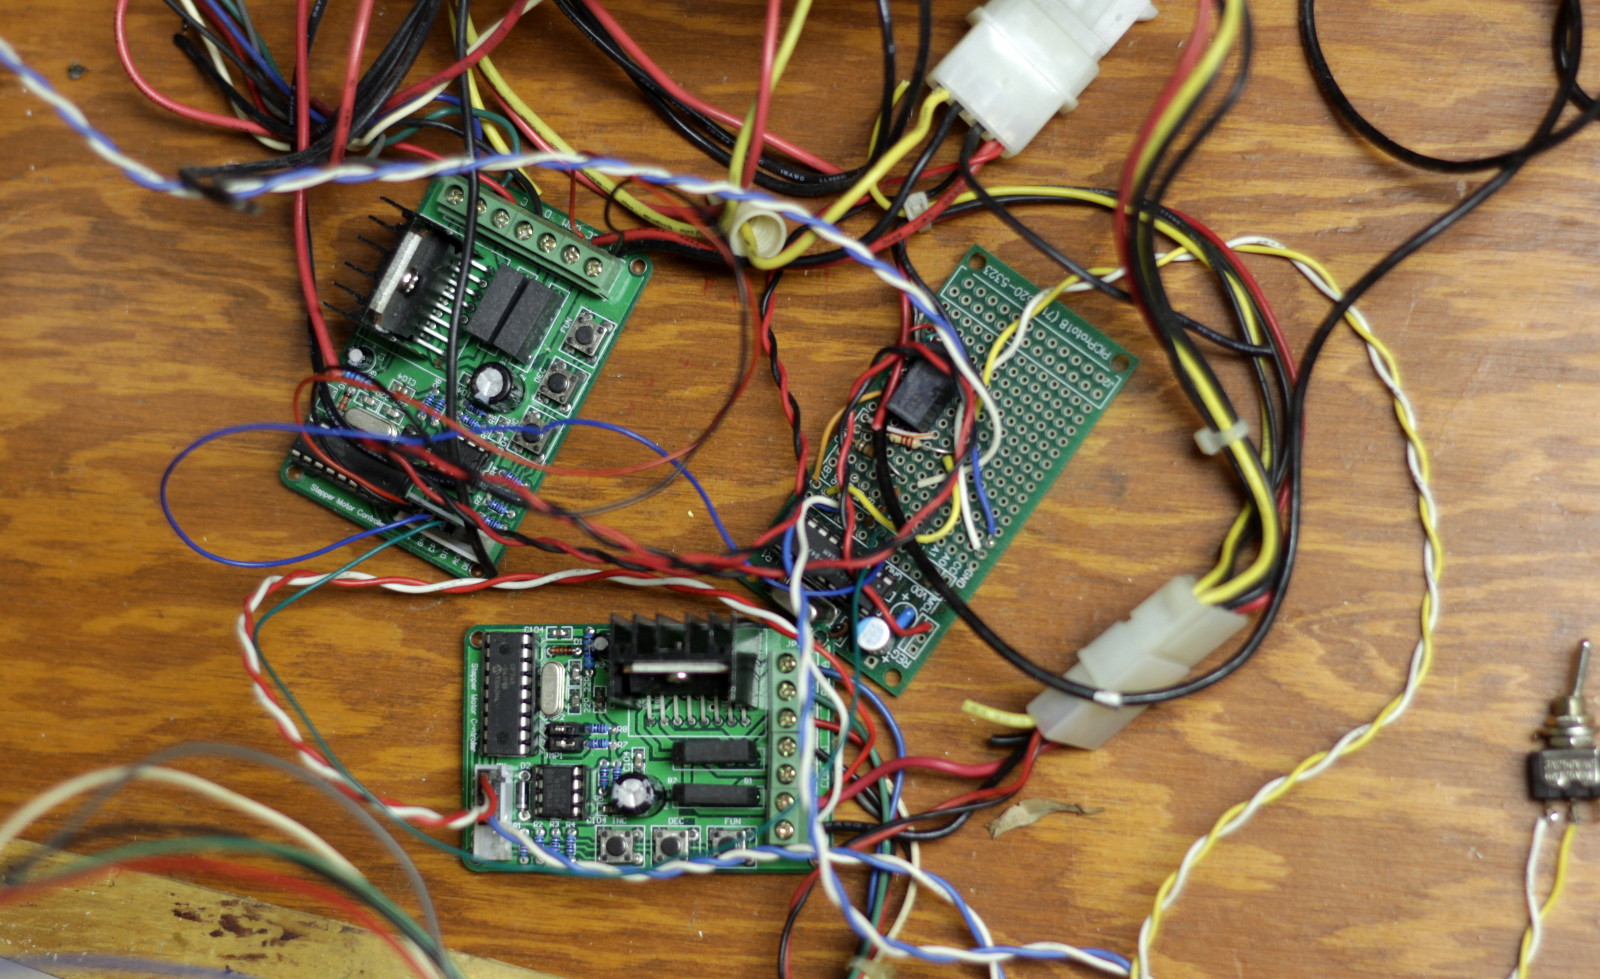
To run the various steppers I have a couple of inexpensive stepper motor controllers and I programmed a simple microcontroller to sense the switch and tell the stepper motor controllers when to run. I also added a simple switch to tell the brain when to stop loading the film and to start capturing images. After the controller captures 4000 images or about 100′ of film it shuts down. The whole thing is powered by an ancient recycled computer power supply.
I have some ideas for future additions, but I really don’t know if I will ever get around to it. How about a puff of air to clear the dust just before capture. I could enclose the whole thing and make it look professional. I could enhance the interface to capture an adjustable number of frames. A newer camera would probably give me more pixels and recover faster when taking a picture. This could not go too much faster before outrunning the camera.
Film: I have used several different kinds of 16mm film but mostly I use a color intermediate film Eastman 7243 that was not intended to be shot in a camera but used to make duplicates of negatives. This film I rate at asa 12 or asa 6 depending on the situation. This film allows me to use a relatively open aperture on my camera and shoot in bright sunlight. It is low contrast and has a very fine grain. But the real reason I use it … It is really cheap.
Camera: My current go to a Bolex H16 reflex camera. It is reliable and easy to use. The reflex aspect is very nice, I like having my subject in focus. I also use the Filmo 70a for fun or in situations where I don’t want to risk damaging the Bolex.
Camera Settings: I almost never use a light meter. I use the sunny 16 rule and adjust to my situation. Let see – it is sunny and the film is 6 Asa and my shutter speed is twice the reciprocal of my frame rate, so 1/48th of a second – hmmm 6 – 12 – 24 – 48 so I should open up 3 or 4 stops from f/16. It is a lot quicker if I just call it the sunny f/5.6 rule. Of course if I can’t open up enough I can always slow the frame rate down and get an extra stop or two. Anyway this works and once you get used to it, it is pretty quick.
Processing: Again, I am cheap and I like to do stuff myself, so I process everything myself. I don’t like complicated either so I do a very simple hand processing method using the least equipment and chemicals possible. I process in a hand made dark tank. It is a simple affair that is easy and cheap to build. The film is spooled off the daylight reel in a dark room and bunched up and stuffed into the dark tank. Then the film gets a quick wash in a warm borax solution for a couple of minutes, then a rinse in water, a 5 minutes develop in dektol, then a rinse, then a 5 minute soak in fixer and then a final rinse. Let the film hang dry for an hour or two and it’s time for spooling and digitizing.
Digitizing: I fought with this step for quite a while. At first I bought an old B&H projector and just projected the reel and shot the result with whatever camera I had laying a round. But I was unhappy with the results. You can never get the shutter of the camera and projector to line up and the rate was always off, a bad flicker is the result. I tried several methods before I settled on my current setup. I took another old 16mm projector and retrofitted it with a stepper motor drive and a microswitch on shutter. So I can control move the film slowly and precisely through the projector. I also changed the light source to a LED bulb with a diffuser. I use a Canon G5 camera that is aimed back into the lens to individually capture each frame as a high resolution image. It take a couple of hours for the rig to run through and capture a single 100′ of film but I like the results much better. Digitizing one 100′ reel leaves me with about 4000 – 1.5mb images that crop down to a 1600×1200 image so I can do a 1080p movie without losing quality.
Editing: I take the images and drop them into Avidemux for initial processing. This program allows me to crop, rotate, invert the negative and color correct all in one pass. The output can be any number of formats including uncompressed avi’s to highly compress mpeg4’s. I take these files and load them into Sony Vegas pro for the final editing to a youtube or dvd type output.
Here is a quick example of what the files look like before and after processing.